
Blog by Amit Apple
Azure WebJobs are doing work and running some process you expect not to be interrupted but as in life not everything is as expected and sometimes there are interruptions which can stop your WebJob abruptly without notice aborting your process and maybe leaving your work in some bad state.
These interruptions could be due to: stopping your site, restarting your site, some configuration change to your site which causes your site to restart, Azure maintenance (version update for example) or even the VM simply crashing for some reason.
For these kind of interruptions (minus VM crash) there is a concept of a more "graceful" shutdown process for a WebJob which can help you cleanup before your WebJob is forcefully stopped.
As usual with WebJobs this concept is a bit different for continuous and triggered WebJobs, let's discuss on both.
For continuous WebJobs Azure will notify the WebJob running process when it is about to stop it, then it'll wait a configurable amount of time (which is 5 seconds by default) after which if the process did not exit quietly it will close it.
The way Azure notifies the process it's about to be stopped is by placing (creating) a file at a path that is passed as an environment variable called WEBJOBS_SHUTDOWN_FILE.
Any WebJob that wants to listen on the shutdown notification will actually have to check for the presence of the file (using simple File.Exists function or using a FileSystemWatcher in whatever script language you use), when it shows up the WebJob will need to start cleaning up and break it's current loop where preferably it'll exit properly and Azure will continue the shutdown (of the site) process.
public class Program
{
    private static bool _running = true;
    private static string _shutdownFile;

    private static void Main(string[] args)
    {
        // Get the shutdown file path from the environment
        _shutdownFile = Environment.GetEnvironmentVariable("WEBJOBS_SHUTDOWN_FILE");

        // Setup a file system watcher on that file's directory to know when the file is created
        var fileSystemWatcher = new FileSystemWatcher(Path.GetDirectoryName(_shutdownFile));
        fileSystemWatcher.Created += OnChanged;
        fileSystemWatcher.Changed += OnChanged;
        fileSystemWatcher.NotifyFilter = NotifyFilters.CreationTime | NotifyFilters.FileName | NotifyFilters.LastWrite;
        fileSystemWatcher.IncludeSubdirectories = false;
        fileSystemWatcher.EnableRaisingEvents = true;

        // Run as long as we didn't get a shutdown notification
        while (_running)
        {
            // Here is my actual work
            Console.WriteLine("Running and waiting " + DateTime.UtcNow);
            Thread.Sleep(1000);
        }

        Console.WriteLine("Stopped " + DateTime.UtcNow);
    }

    private static void OnChanged(object sender, FileSystemEventArgs e)
    {
        if (e.FullPath.IndexOf(Path.GetFileName(_shutdownFile), StringComparison.OrdinalIgnoreCase) >= 0)
        {
            // Found the file mark this WebJob as finished
            _running = false;
        }
    }
}
For triggered WebJobs there is no shutdown notification but there is a graceful period (30 seconds by default) where the WebJob will not be forcefully shutdown immediately, the graceful period is configurable.
The graceful period can be updated for any WebJob, the way to do it is to create a file called settings.job with the following content: { "stopping_wait_time": 60 }
The time is specified in seconds
This file is representing a json object of your WebJob's setting, for now the only meaningful settings are
stopping_wait_timeandis_singleton(for continuous WebJobs to set them to run only on a single instance).
If you have any questions on this topic feel free to leave comments.
Microsoft Azure WebJobs are awesome, and now a little bit more... I'm going to show you how you can setup a notification whenever your triggered (on-demand or scheduled) WebJobs completes.
The notification part is done by integration between Azure and Zapier which provides many different notification types such as: email, phone call, SMS, Facebook post and more, for this post I'll use a phone call but it is very easy to use any of them.
NOTE: In a previous post I explained about Zapier and how you can have a notification when your Azure Web App deployment completes, this is very similar only with a triggered WebJob.
Let's do it:
An Azure Web App with at least 1 triggered (on-demand or scheduled) WebJob (although you can add it later).
Sign up to Zapier
Have both the Zapier and Azure portal open
Go to Zapier and create a new zap (Make a Zap!).
For the trigger service select Azure Web Sites.
For the trigger select New Triggered WebJob Run.
For the action, we'll select Phone and Call Phone for this sample but any can be selected.

Click Continue
We need to connect to our Azure Web Site hosting our triggered WebJob, for this we need one piece of information from the Azure portal.
This is the tricky part:
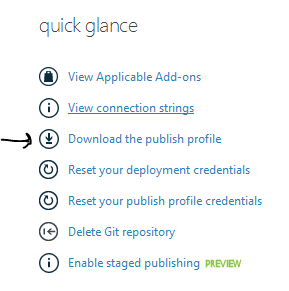
If your website has continuous deployment setup --> in the Azure portal go to your website, click on the CONFIGURE tab and under the git section copy the url which is under the DEPLOYMENT TRIGGER URL.

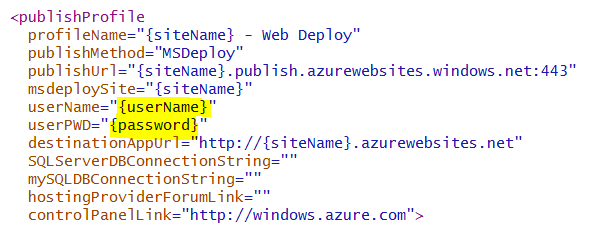
If you don't have continuous deployment, you can author this url yourself, it is: https://{userName}:{password}@{siteName}.scm.azurewebsites.net/deploy where you get the {userName} and {password} from your site's publishing profile.
Go back to the Zapier site and paste this url to the Deployment URL textbox, enter a name for this website account and click continue.

Now create your phone account by providing the phone number and verifying it.
At this point you can filter when you actually want to initiate the action, for example only when the WebJob run fails or only for a specific WebJob (by name), for now we keep this empty as we want to be notified on all WebJobs runs, click continue.
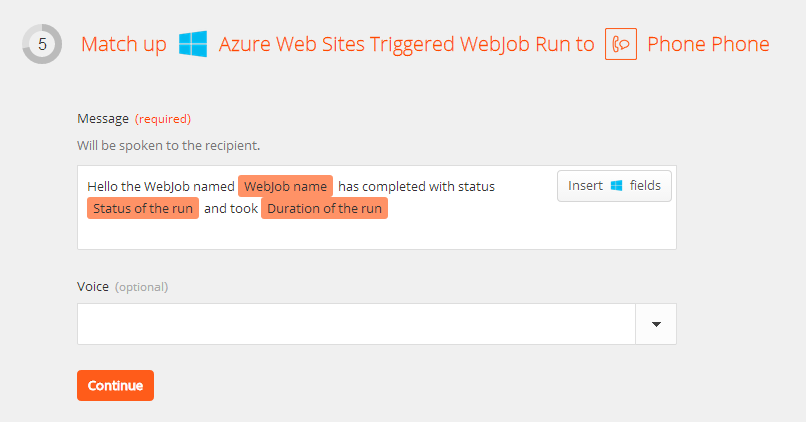
Next you specify the content of the message, it can be static and dynamic using the WebJob run result.
For example we'll use: Hello the WebJob named {{job_name}} has completed with status {{status}} and took {{duration}}, on the right you can use the "Insert fields" button to add other interesting dynamic fields.
You can even choose the voice of the caller (Man/Woman), I'll let you pick this one.
Continue
Test this Zap lets you test your zap by getting previous WebJob runs and doing the selected action on them, click the button and then you can skip the step or test your Zap.
Name and turn this Zap on
Now go to your Azure portal, run your WebJob, wait for it to complete and wait for the call :)
Get more help about Windows Azure Web Sites on Zapier.
In Microsoft Azure Web Apps you have the ability to scale your site by adding more instances to it where each instance is running on a different VM.
When you have more than one instance a request made to your site can go to any of them using a load-balancer that will decide which instance to route the request to based on how busy each instance is at the time.
One feature of this load-balancer is that once a request from your browser is made to the site, it will add a "cookie" to it (with the response) containing the specific instance id that will make the next request from this browser go to the same instance.
We can use this feature to send a request to a specific instance of our site.
The name of the cookie we're going to use is: ARRAffinity
    private static async Task<HttpResponseMessage> GetFromInstance(Uri url, string instanceId)
    {
        var cookieContainer = new CookieContainer();
        using (var handler = new HttpClientHandler() { CookieContainer = cookieContainer })
        {
            using (var httpClient = new HttpClient(handler))
            {
                cookieContainer.Add(url, new Cookie("ARRAffinity", instanceId));
                return await httpClient.GetAsync(url);
            }
        }
    }
The problem that we have now is getting this instance id, in the update below I'll show how, but a specific site can find out it's own instance id by looking at the environment variable called: WEBSITE_INSTANCE_ID.
So one application for this is that we can create a WebJob that is able to call the Website it is hosted on.
    private static void Main(string[] args)
    {
        string instanceId = Environment.GetEnvironmentVariable("WEBSITE_INSTANCE_ID");
        string siteName = Environment.GetEnvironmentVariable("WEBSITE_SITE_NAME");
        var url = new Uri("http://" + siteName + ".azurewebsites.net/");
        var response = GetFromInstance(url, instanceId).Result;
        Console.WriteLine(response.Content.ReadAsStringAsync().Result);
    }
Azure Web Sites now provides an API to get all instances (IDs) for your website, you can either do it programmatically or using the Azure CLI tools.
First thing to do is install the Azure Web Apps Management Library from nuget, this is the SDK for managing your Azure Web Site from code.
Now all you need is this code:
internal class Program
{
    private static void Main(string[] args)
    {
        var cert = new X509Certificate2();
        cert.Import(Convert.FromBase64String("MIIJ/...=="));
        var client = new WebSiteManagementClient(new CertificateCloudCredentials("subscription_id_guid", cert));

        var instanceIds = client.WebSites.GetInstanceIds("westuswebspace" /*webspace name*/, "somesite" /*web site name*/);
        Console.WriteLine(String.Join(", ", instanceIds));
    }
}
Azure has CLI tools for both PowerShell (for windows users) and xplat using node.js under the cover (for all users including mac, unix and windows).
To get these tools you can go to this link.
To install the xplat tool you can simply write the following command: npm install azure-cli -g
For more information on using the CLI tools you can go to these links: Managing the Cloud from the Command Line and Azure PowerShell - MSDN
Tip for PowerShell - Start by using the following command:
Add-AzureAccount.
In both tools you get the website's instance ids by getting/showing the website.
Get-AzureWebsite sitename

Instances                   : {6d016e86bc41ff8e2fcf5d66da0116e929b41609a8cace17b40b6c5e4eb15b44}
NumberOfWorkers             : 1
...
> azure site show sitename

info:    Executing command site show
info:    Showing details for site
+ Getting site information
+ Getting site config information
+ Getting repository settings
+ Getting diagnostic settings
+ Getting site instances information
+ Getting locations
data:
data:    Web Site Name:  sitename
data:    Site Mode:      Standard
data:    Enabled:        true
data:    Availability:   Normal
data:    Last Modified:  Mon Jun 16 2014 18:46:58 GMT-0700 (Pacific Daylight Time)
data:    Location:       West US
data:
data:    Host Name
data:    ------------------------
data:    sitename.azurewebsites.net
data:
data:    Instance Id
data:    ----------------------------------------------------------------
data:    6d016e86bc41ff8e2fcf5d66da0116e929b41609a8cace17b40b6c5e4eb15b44
...
Hope this helps.