
In previous posts I talked about Microsoft Azure Web App's custom deployment feature and the tool to easily generate a deployment script, in this post I'll do a step by step guide on writing a custom deployment script.
Let's say we have two websites in azure, one is a node.js website and the other is an mvc4 web application, both sites sources are in the same repository so we need a deployment script that handles differently based on which website it is deploying.
Some Prerequisites:
npm install azure-cli -gazure site deploymentscript --node --sitePath nodejs
Notice the files that were generated:
- .deployment - a file telling which command to run for deployment (currently deploy.cmd).
- deploy.cmd - the deployment script.
- nodejs\web.config - configuration for iis to run node.js.
- nodejs\iisnode.yml - this file allows some configuration settings relating to node.js, more info on iisnode.yml
Rename deploy.cmd to deploy.node.cmd: move deploy.cmd deploy.node.cmd
At the root of the repository enter the command:
azure site deploymentscript --aspWAP mvc4\Mvc4WebApplication\Mvc4WebApplication.csproj -s mvc4\Mvc4WebApplication.sln

move deploy.cmd deploy.mvc4.cmdNOTE: You can also edit this generated file (deploy.cmd) with any custom steps you have, you can also test it on your machine simply by running it, it will publish your website to %REPOSITORY_ROOT%\artifacts.
%SITE_FLAVOR% will be set by Windows Azure with the value we'll give it in the management portal.
Add all generated files and commit them to the repository.
git push WA master
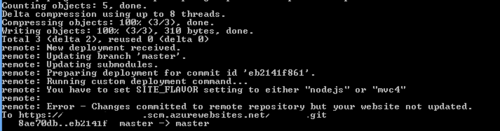
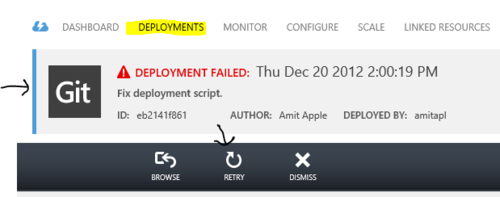
We receive an error and the deployment fails since we still haven't set the app setting yet, so let's do that.
Go to the website on windows azure management portal and add under the CONFIGURATION tab under "app settings" a setting with name SITE_FLAVOR and value nodejs/mvc3 (based on the current site we're configuring).

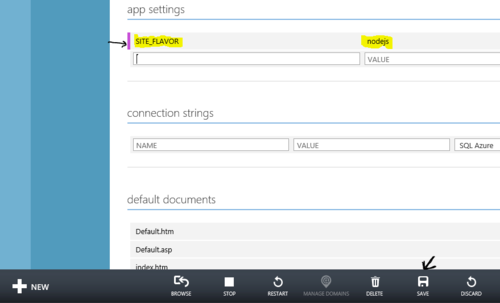
Click on the "Save" button.
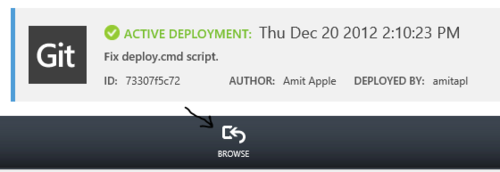
Now we can either push our changes again (we'll need a new commit, even an empty one, otherwise it'll tell us that nothing has changed and the deployment won't reinitiate).
NOTE: Another improvement we could do here is to store the repository on GitHub/Bitbucket and connect them to our 2 sites, now every time we push to GitHub/Bitbucket, both of our sites will be deployed.
The repository I've used can be cloned from here.