
Blog by Amit Apple
I've been wanting to self-host my blog on my own Microsoft Azure Web App for some time now and I've found the perfect solution (for me) to do that in Sandra.Snow.
Sandra.Snow is a Jekyll inspired static site generation tool that can be run locally, as a CAAS(Compiler as a Service) or setup with Azure to build your site when your repository changes. It is built on top of NancyFX.
It allows me to store all my posts as markdown files on a git repository on GitHub, and having my Website hooked up to that repository so whenever I push a new change/post my site is automatically redeployed and updated.
Microsoft Azure WebJobs is a new feature coming from Microsoft Azure Web Apps, you can read all about it here.
While you can easily add a new WebJob using the Windows Azure portal, you may want to deploy your WebJob in other ways (ftp / web deploy / git), In this post I'll explain how these WebJobs are stored on your Azure Web App and how you can deploy a new WebJob.
A WebJob is stored under the following directory in your site:
site\wwwroot\App_Data\jobs\{job type}\{job name}
Where {job type} can be either continuous for a job that is always running or triggered for a job that starts from an external trigger (on demand / scheduler).
And {job name} is your WebJob's name.
So a continuous WebJob called myjob will be located at:
site\wwwroot\App_Data\jobs\continuous\myjob
The WebJob directory can contain 1 to as much as you'd like files but at the least it should contain the script that starts the WebJob's process, this script can currently be: batch (.exe/.cmd/.bat), bash (.sh), javascript (.js as node.js), php (.php) or python (.py).
The script to be run is automatically detected using the following logic:
NOTE: If you have some other type of execution engine you wish to use and is currently not supported, you can always create a run.cmd file and create your executor command there (
powershell -Command run.ps).
So with this information we know that in order to create a new continuous job called myjob all you have to do is get your job's binaries to that folder.
One way to do this is to connect to your site via ftp, create the right directory and copy the binaries there (should include at least one supported script file).
That's it, the WebJob will be auto-detected and immediately start running.
To deploy a website with WebJobs, all you'll need to do is to make sure you deploy your WebJobs are in the right place, take a look at the following structure as an example for a node.js site with a web job:
./server.js
./App_Data/jobs/continuous/myjob/run.cmd
While this project contains only 2 files, it actually is a website with a continuous WebJob, and you can use whatever deployment preference you have to deploy this (ftp / web deploy / git / ...).
Continuous - After you redeploy a WebJob, the currently running process will abort and restart with the new binaries.
Triggered - Redeployment will not affect a currently running WebJob but the next run will be using the new WebJob's binaries.
NOTE: Before a WebJob starts to run, the binaries for it are copied to a temporary directory, this way you can always re-deploy a WebJob safely without worrying that the files are locked.
One issue we encounter with this method is that when you deploy a triggered WebJob, the result is a WebJob that is only on demand meaning you need to press the RUN ONCE button in the portal in order to initiate it and (for now) there is no way to easily add a schedule to it.
A workaround would be to create a dummy schedule WebJob with the name you are about to deploy and the deployment will just replace the binaries but keep current schedule.
There's a new concept coming from Microsoft Azure Web Apps called WebJobs where you can have scripts running on a schedule, continuously or simply by invoking them manually.
In this article I'll talk about a simple way of deploying a .NET console application to Microsoft Azure Web Apps which will be deployed as a continuous job.
In short, a continuous job is treated similar to a windows service, as long as it's started/enabled, Azure will make sure it's up, it'll start the process (on all of your instances) and whenever the process goes down it'll simply bring it back up (after a 60 seconds delay).
The executable that is deployed as a continuous job should have some kind of an infinite loop (while (true)).
Note: While you can experiment with continuous jobs in free or shared websites, it'll only work properly in a standard website that has the "always on" setting set, this is since in free/shared sites the jobs process will be brought down after about 20 minutes of no requests to it (a request to the jobs process can be to check the status of current jobs).
Enough chit-chat, now to the main event, we have .NET code which we want to (continuously) run on Azure, here are the steps:
Add your code to a git repo.
git init
git add .
git commit -am Coding
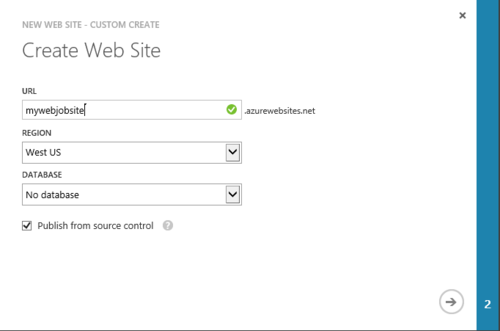
Create a new web site with source control.
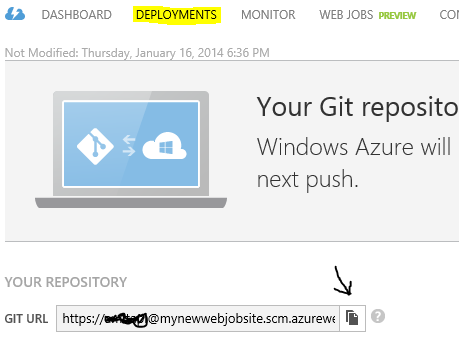
Push the repository to your site.
git push http://.../.git master
That's it, you now have your .NET console application running on Microsoft Azure Web Apps, just go to the WEBJOBS tab and take a look.

Note: Don't forget to enable the Always On feature if you're on standard to make sure this job will never stop running.
Now to see the continuous job logs click on the "logs" link (you'll need to enter your publishing user name and password, if you're on chrome even better - it just works), there you would see all the system logs (when the job started, stopped, etc...).
To see the logs produced by the application (console output and error) you need to enable application logging under the CONFIGURATION tab, your logs can go to your file system/azure storage table or blob.
Note: You can also use app settings/connection strings which would come from the site's configuration, same as you would do for your ASP.NET website.
There are more awesome things to say about webjobs, but that's in next posts.